The entire Haptik backend infrastructure runs in a containerized environment. As the journey progressed we took some crucial decisions which have helped us reach where we are today, in terms of deployments and various other pipelines. This will be covered further on another blog post on CI/CD.
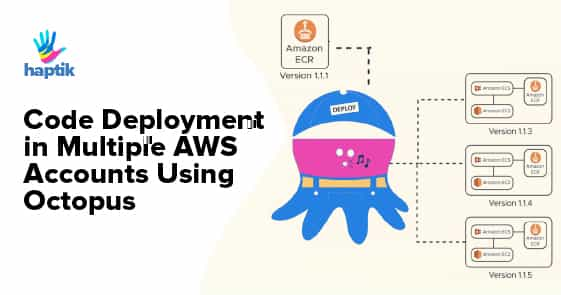
We are fully hosted on AWS and given the nature of clients we have, we sometimes have to support a multi-tenant setup where we need to bring up a new environment in our clients AWS account. For code deployment in these accounts, we wanted to make it possible to have different streams of releases, with different steps, variables, lifecycles and code releases.
We were trying to find an efficient way to deploy code to multiple AWS accounts. Of course, there are a few services for Code deployments that AWS offers from its line of Deployment services. But we wanted to keep the solution a bit agnostic to start with.
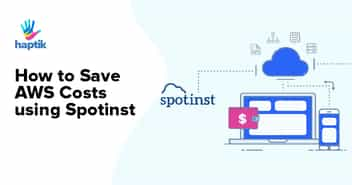
Most of our Applications are deployed on AWS ECS as containers/tasks and ECS helps us Orchestrate the application containers. Spotinst also comes in to help to keep these deployment costs low.
While researching we came across a tool known as Octopus Deploy.
What is Octopus?
Octopus is the deployment automation server, designed to make it easy to orchestrate releases and deploy applications, whether on-premises or in the cloud.
Some Salient Features:
1. Multi-tenant application deployments
2. Multiple active streams of releases: Use channels to keep multiple streams of active releases – for example, a 1.x “stable” stream while you maintain what’s in production today, and a 2.x “beta” stream while you work on the next big thing for tomorrow.
3. Automated deployment from Jenkins
4. Automated deployments to AWS
Why Octopus?
We needed something that doesn’t put any or little overhead on the developers & could fit in with our existing Continuous Deployment pipeline. This is where we thought Octopus could come into the picture.
One of the Major reasons to choose Octopus was: Keeping track of what release versions have been deployed in an ECS cluster’s service.
The solution to the problem is discussed in our earlier blog – Empowering Developers at Haptik. Please give it a read if you haven’t yet.
At Haptik, the DevOps practice is brought up in such a way that the developers are responsible for the code release, we needed something that would fit in the pipeline just as a puzzle piece. Moving on, the solution had to be something that would integrate with our existing Jenkins pipeline with the help of a simple plugin, building on top of the current CD pipeline.
Deploying Code on ECS using Octopus
A typical in-house ECS deployment for us looks like the following:
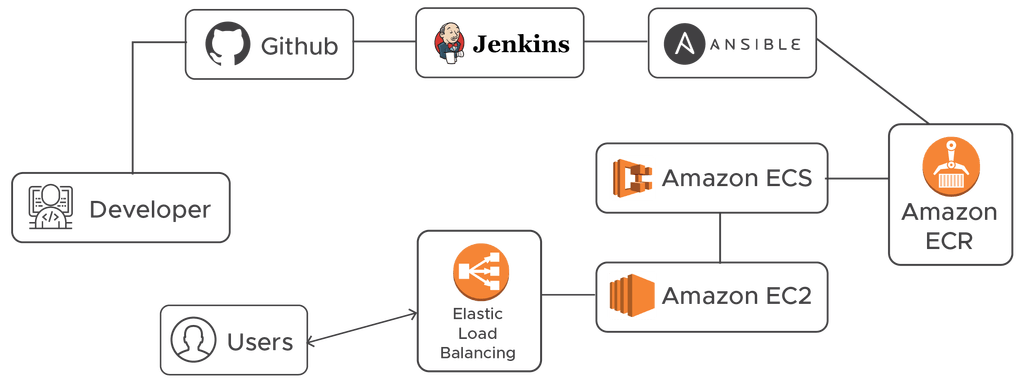
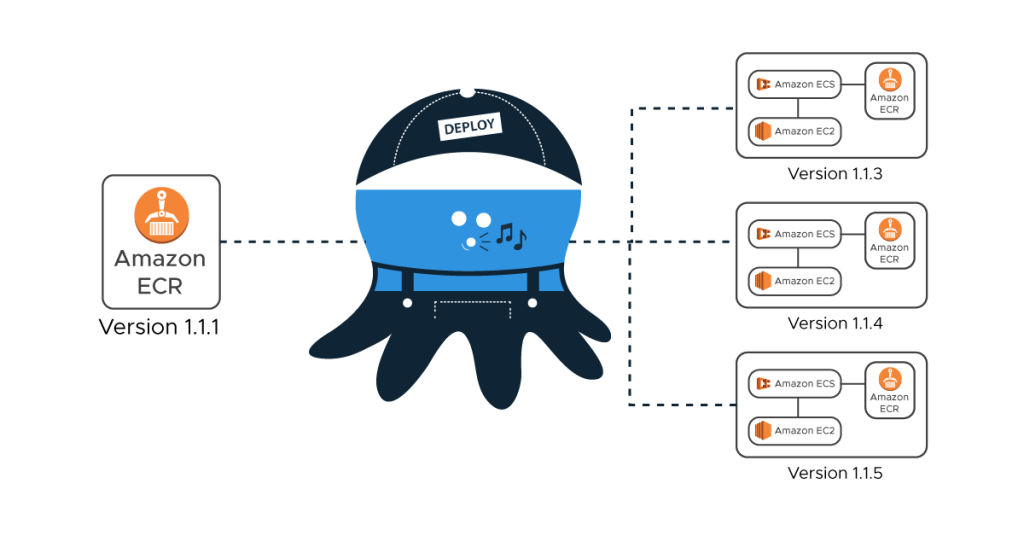
For our internal AWS account deployment, we create a Docker container image with the latest code and package updates and upload the same to ECR. Now, for new AWS account deployments for the Haptik applications, we do not want to build the images again. We want to deploy the appropriate ECR image along with the precise Task definition settings.
Octopus currently doesn’t have an ECS specific deployment step, but we could still make use of a multi-package script step to update our ECS Task definition and the ECS Service. This will allow us to use Octopus to control the Docker image release version deployed throughout our deployment pipeline, as well as manage the different variables, settings & environment variables that are necessary to be supplied to the ECS Task Definition.
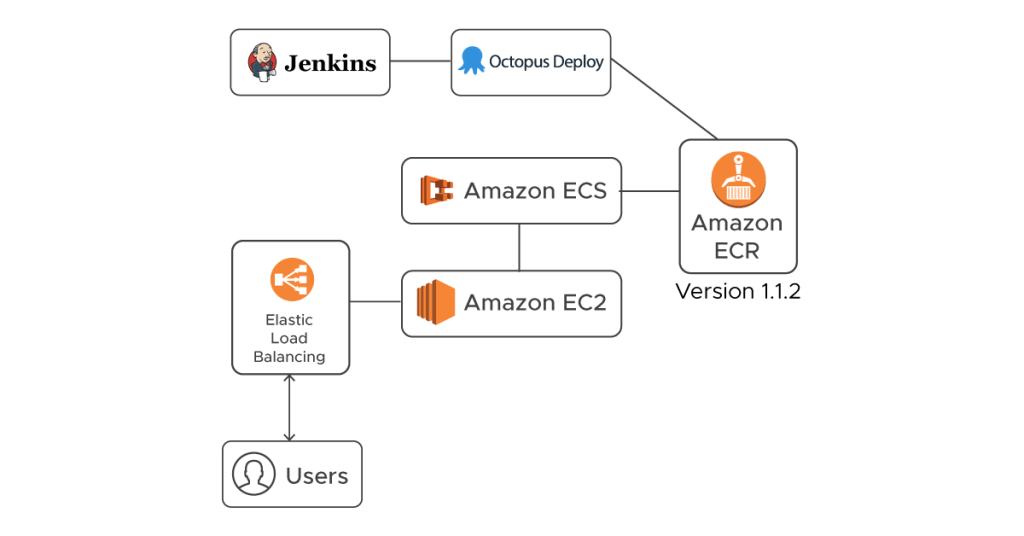
Above is what an Octopus code deployment pipeline at Haptik looks like. More or less all of it means that code can be deployed simply by firing a few Jenkins jobs. Let us briefly discuss the process of how it works behind the scene.
Getting Started
Signup here: https://octopus.com/
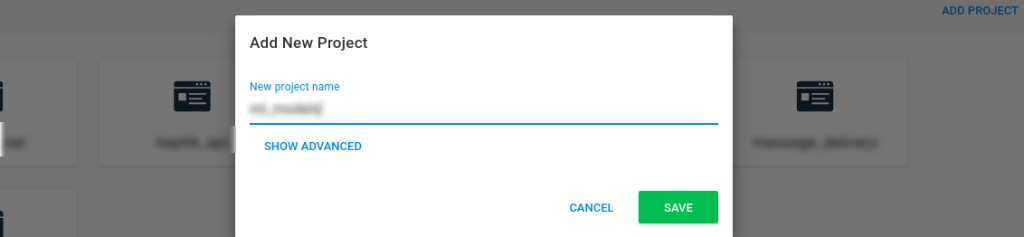
Create a new project and add a Run an AWS CLI Script step to your project:
We use the Docker images pushed to **AWS ECR** during the continuous delivery pipeline and the images are tagged with release version which makes it is easier to identify which version to push out to our clients & we do a blue-green deployment with the help of Amazon ECS.
Add the ECR feed to Octopus Deploy
You will then need to supply your AWS credentials and region that the AWS Elastic Container Registry is in. Give necessary privileges to the repository for the secondary/client account to access the Elastic Container Registry
Deploying Image to AWS ECS
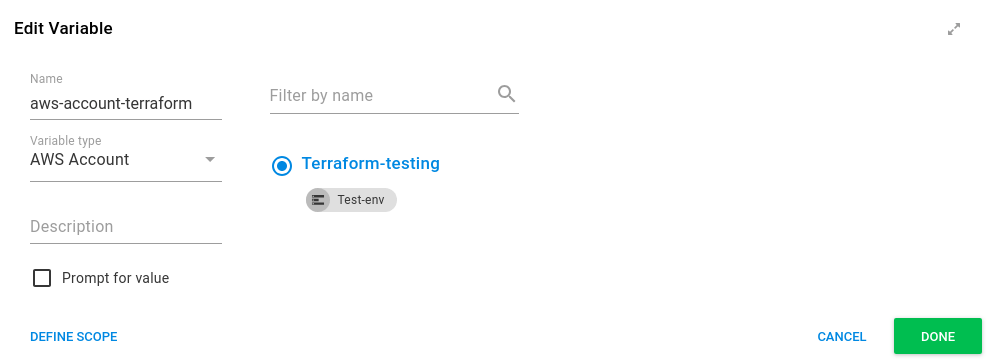
Enter the AWS Region that the ECR services are located in and select the AWS account that has the necessary permissions to create ECR Tasks and update the ECR services:

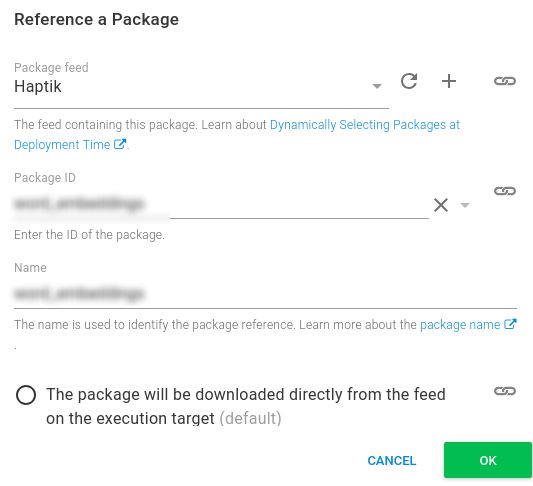
Skip down the Referenced Packages section and add the Docker Image that we added to our ECR feed. For this image, we don’t need to do any package acquisition since that will be handled by AWS itself. So selecting the package will not be required option.
We will be breaking up the AWS CLI script in 3 parts:
- 1. Defining the containers
# Port Mapping $PortMappings = New-Object "System.Collections.Generic.List[Amazon.ECS.Model.PortMapping]"$PortMappings.Add($(New-Object -TypeName "Amazon.ECS.Model.PortMapping" -Property @{ HostPort=0; ContainerPort=80; Protocol=[Amazon.ECS.TransportProtocol]::Tcp})) $MountPoints = New-Object "System.Collections.Generic.List[Amazon.ECS.Model.MountPoint]"$MountPoints.Add($(New-Object -TypeName "Amazon.ECS.Model.MountPoint" -Property @{ ContainerPath="/opt/models"; SourceVolume="Models"; ReadOnly="true";})) # Environment Variables $EnvironmentVariables = New-Object "System.Collections.Generic.List[Amazon.ECS.Model.KeyValuePair]"$EnvironmentVariables.Add($(New-Object -TypeName "Amazon.ECS.Model.KeyValuePair" -Property @{ Name="ENVKEY"; Value=$OctopusParameters["envkey_token"]})) # Ulimits $Ulimits = New-Object "System.Collections.Generic.List[Amazon.ECS.Model.Ulimit]"$Ulimits.Add($( New-Object -Type "Amazon.ECS.Model.Ulimit" -Property @{ HardLimit="64000"; SoftLimit="64000"; Name="nofile"; })) # Logging driver $LogOptions = New-Object "System.Collections.Generic.Dictionary[String,String]"$LogOptions.Add("awslogs-group",$OctopusParameters["aws_log_group"])$LogOptions.Add("awslogs-region",$OctopusParameters["aws_region"]) #Define Container Write-Host "Adding Container Definition for" $OctopusParameters["Octopus.Action.Package[word_embeddings].Image"]$ContainerDefinitions = New-Object "System.Collections.Generic.List[Amazon.ECS.Model.ContainerDefinition]"$ContainerDefinitions.Add($(New-Object -TypeName "Amazon.ECS.Model.ContainerDefinition" -Property @{ ` Name="base_service"; ` Image=$OctopusParameters["Octopus.Action.Package[word_embeddings].Image"]; ` PortMappings=$PortMappings; ` Essential="true"; ` Memory=$OctopusParameters["mem_hard_limit"]; MemoryReservation=$OctopusParameters["mem_soft_limit"]; ` MountPoints=$MountPoints; ` LogConfiguration=$LogConfiguration; ` Ulimits=$Ulimits; ` Environment=$EnvironmentVariables;})) # Volume $Volume = New-Object "System.Collections.Generic.List[Amazon.ECS.Model.Volume]"$Volume.Add($(New-Object -Type "Amazon.ECS.Model.Volume" -Property @{ Name="Models"; Host=$(New-Object -Type "Amazon.ECS.Model.HostVolumeProperties" -Property @{ SourcePath="/opt/models"; }); })) |
We have to explicitly set the environment variables into the container definition for this task. Notice that when providing the image details, we are using the Octopus.Action.Package[web].Image variable described above. This value will be derived from the image version selected during the release.
- 2. Create Task with updated Container Definition
# Create Task $Region = $OctopusParameters["Octopus.Action.Amazon.RegionName"]$TaskName = $OctopusParameters["taskdef_name"]$ExecutionRole = $OctopusParameters["aws_iam_role_arn"]Write-Host "Creating New Task Definition $TaskName"$TaskDefinition = Register-ECSTaskDefinition ` -ContainerDefinition $ContainerDefinitions ` -Family $TaskName ` -Region $Region ` -Volumes $Volume ` -RequiresCompatibility "EC2" if(!$?) { Write-Error "Failed to register new task definition" Exit 0 } Write-Host "Created Task Definition $($TaskDefinition.Family)"Write-Host "Created Task Definition $($TaskDefinition.TaskDefinitionArn)"Write-Verbose $($TaskDefinition | ConvertTo-Json) |
By loading the task name from an environment variable, it means that we can vary the task per-environment (and tenant if relevant) which allows us to have multiple task definitions for our different deployment contexts.
- 3. Upgrade the Service to Use the New Task
# Update Service $ClusterName = $OctopusParameters["ClusterName"]$ServiceName = $OctopusParameters["ServiceName"]Write-Host "Updating Service $ServiceName"$ServiceUpdate = Update-ECSService ` -Cluster $ClusterName ` -ForceNewDeployment $true ` -Service $ServiceName ` -TaskDefinition $TaskDefinition.TaskDefinitionArn ` -DesiredCount 2 ` -DeploymentConfiguration_MaximumPercent 200 ` -DeploymentConfiguration_MinimumHealthyPercent 50 |
Putting it All Together
The Octopus process looks something like this:
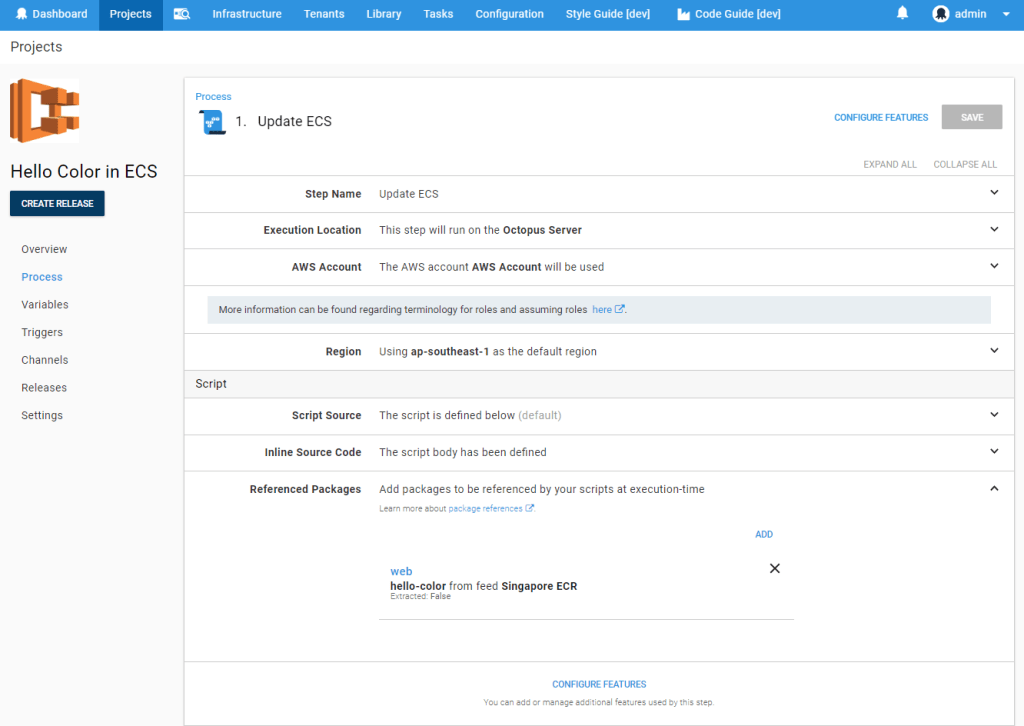
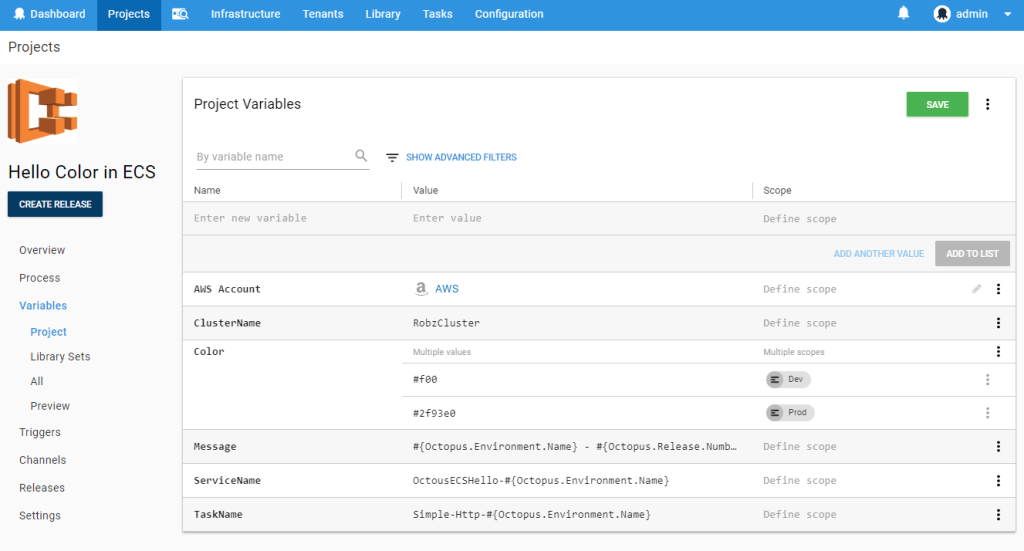
We then add the following variables which will supply configuration for both the ECS infrastructure itself and the details we want to push into the container:
Deployment with Jenkins
Jenkins builds the code and runs tests, while Octopus takes care of:
- Distributing applications to all the remote machines, securely
- Environment-specific configuration, like connection strings & environment variables
Kicking off a deployment you should also notice that although we are using a package (the image), there is no acquisition that takes place. This is because Octopus is just providing the values describing the package for use in our scripts. When the deployment executes the ECS service will run new tasks and, based on the DesiredCount, DeploymentConfiguration_MaximumPercent, and DeploymentConfiguration_MinimumHealthyPercent configuration ensure that the correct number of tasks are active at any given point. This results in a Blue-Green style deployment.
1. Get the API key from Octopus.
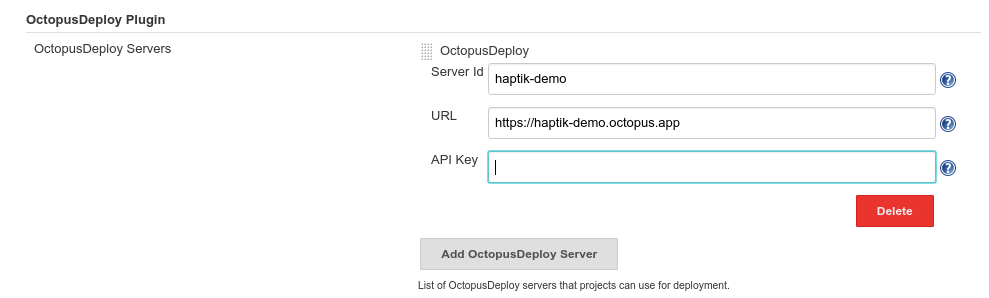
2. Add the key to the octopus plugin to Jenkins

3. Under Configure System setting add the Octopus credentials:
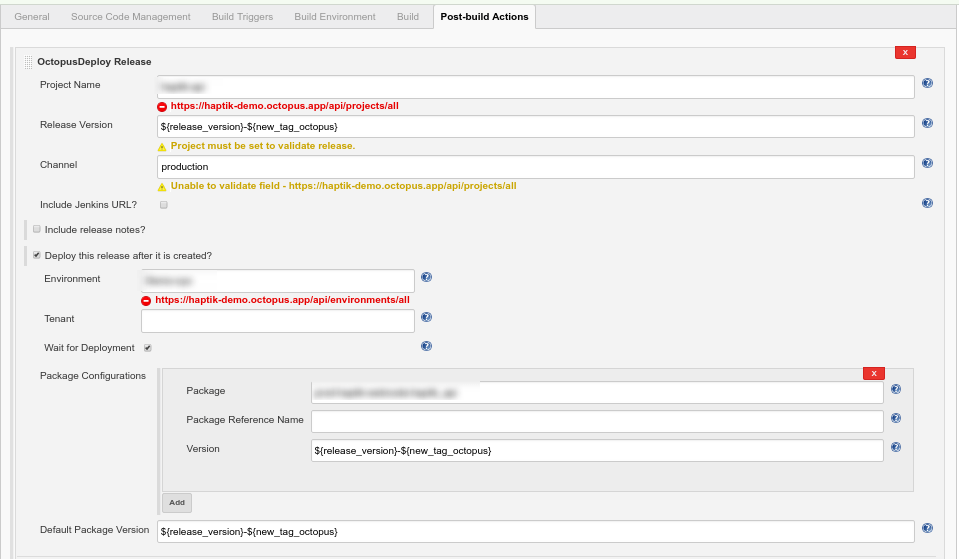
4. Configure the Jenkins to take in the release version and the Octopus package configuration:
You’re all set. An end to end pipeline is ready to deploy an ECR image with a specific tag to any AWS account’s ECS service.
All that is on the developer’s plate is to trigger the Jenkin’s job with the correct GitHub release tag. Hope this blog helps you setting up an ECS deployment pipeline. We will soon come up with more such blogs.
We are hiring for our Architecture DevOps Team at Haptik. Do check out our careers page.